
I had the opportunity to review Everyday Kitchen Essentials Nut Milk Bag.
I have purchased almond milk, but never once thought of making my own almond milk.
But, now I can say that I have done just that, and it is delicious!
The Nut Milk Bag
is a strong nylon mesh bag.
It comes packaged in a plastic wrapper so it is protected.
Once you open the bag, I recommend rinsing it out before use.
This Nut Milk Bag
It comes packaged in a plastic wrapper so it is protected.
Once you open the bag, I recommend rinsing it out before use.
This Nut Milk Bag
can be purchased on Amazon, HERE,
for around $8 and can be used many times over.
For my review, I decided to go ahead and try making my own almond milk using raw almonds I already had in my pantry. You can get the recipe to make your own almond milk by going to the website provided with your Nut Milk Bag.
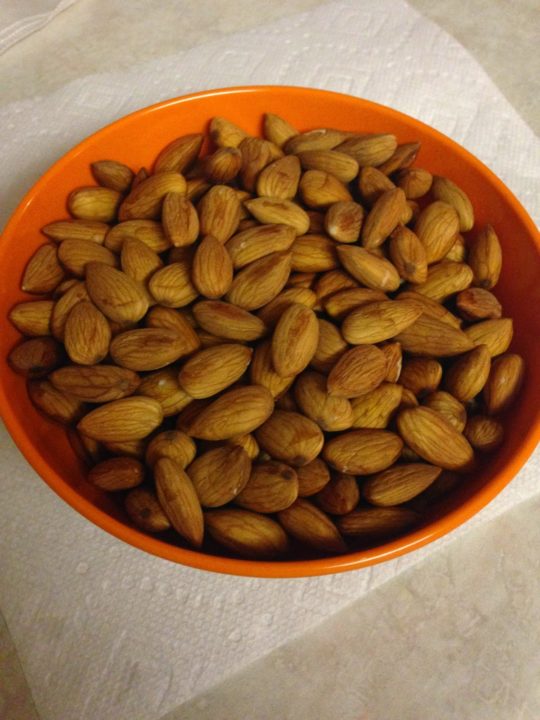
First I had to soak the almonds overnight.
I used 2 cups of almonds and just enough water to cover them in the bowl.
I covered the bowl lightly with a paper towel
just to make sure a gnat or something didn’t decided to join the almonds for a swim.
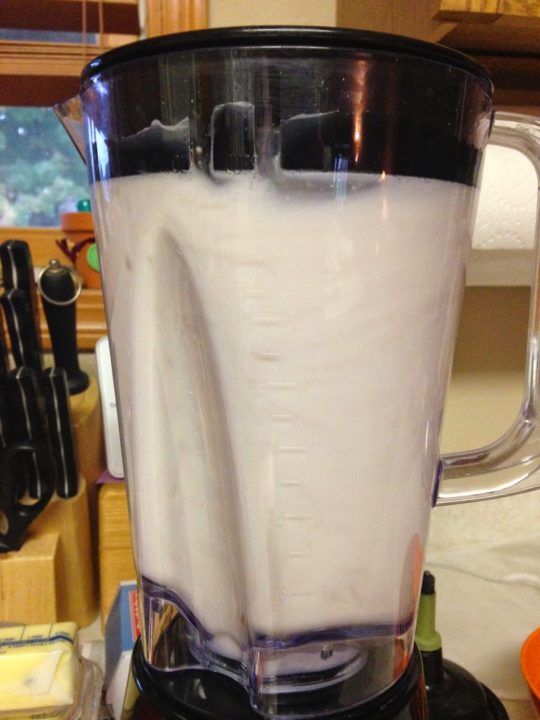
The next morning I took half the almonds and
placed them in my blender with 4 cups of water
and a couple tablespoons of pure maple syrup for a sweetener.
You can use other syrups or sweeteners, this was just what I had on hand.
I then blended it on the highest setting for 5 minutes.
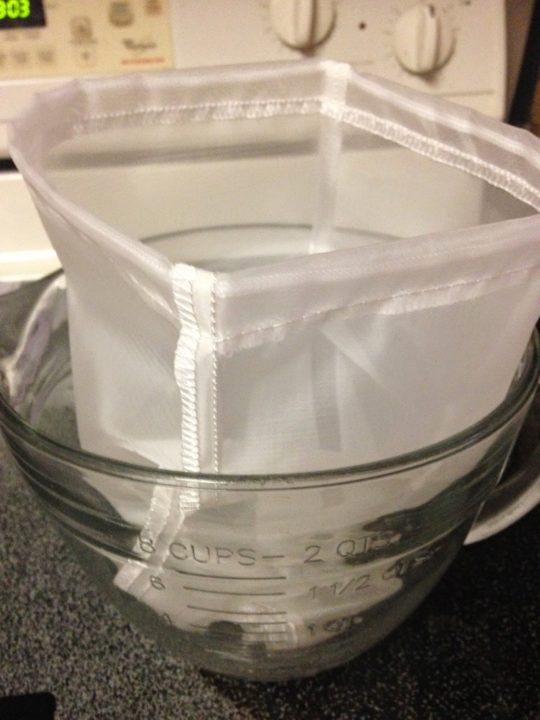
While the nuts were blending, I placed the Nut Milk Bag
in a large mixing bowl.
I slowly poured the blended nuts into the mesh bag.
As you can see there was a foam on the top of the mixture
and pieces of nut shell in the milk.
This is where the Nut Milk Bag
becomes important to this process.
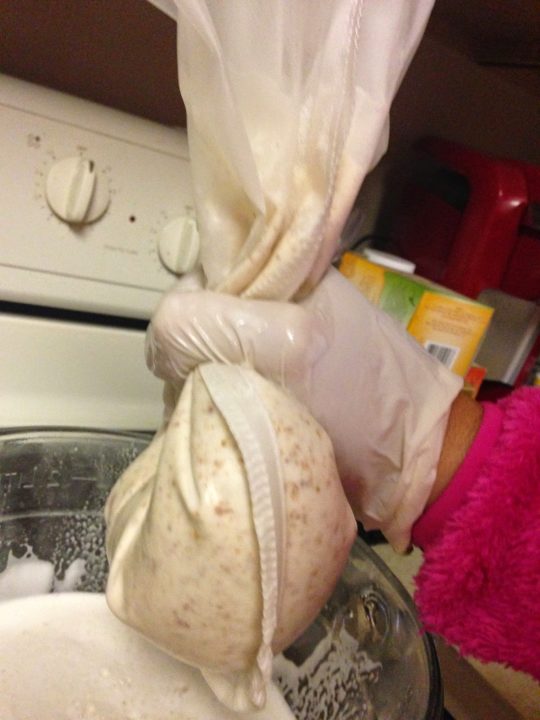
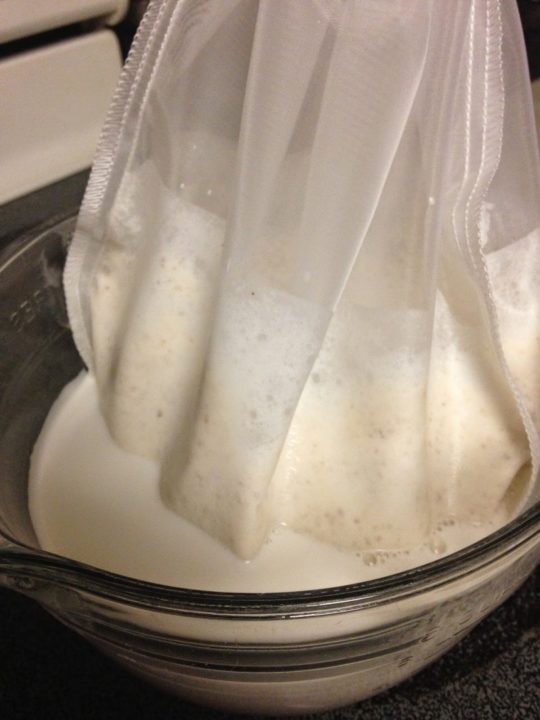
As I began to squeeze out the milk in the bag,
all the pieces of the nut shells stayed in the bag,
while the good, creamy milk went into the bowl.
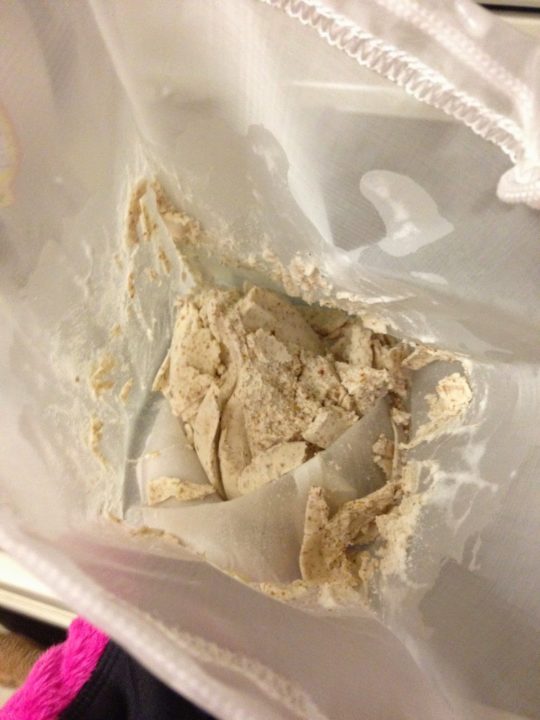
What was left in the bag was a nut paste, kind of like
that moon sand stuff that kids like to play with.
Then, I started the process over again for the second cup of almonds.
Once I finished I had just a little over 8 cups of almond milk.
I placed a lid over the bowl and set it in the fridge to chill.
Then I started the clean up process.
Aside from setting the blender pitcher in the dishwasher,
Aside from setting the blender pitcher in the dishwasher,
I just had to wash and rinse out the Nut Milk Bag.
I wasn’t sure how quickly this process would go,
but I was pleasantly surprised by how easy it was to clean up.
This entire process of making the almond milk and cleaning up took just 30 minutes.
Frankly, it takes me longer to drive to the grocery store to buy almond milk,
than it did for me to actually make it.
The bag cleaned up really quickly
and I just propped it in my dish drainer to dry for the day.
Later that day I took my first sip of almond milk.
It. Was. Amazing.
It was creamy, with just a hint of sweetness.
I could drink it just by itself with a meal.
Really delicious.
Other uses for the Nut Milk Bag
include straining quinoa before cooking,
straining juices when canning or making broth,
and making yogurts or cheeses.
If you normally use a cheese cloth for straining, I highly recommend
using the Everyday Kitchen Essentials Nut Milk Bag
for ease of use, durability and quick cleaning.
To purchase your own Nut Milk Bag, click the photo below:
Thanks to Everyday Kitchen Essentials for sending this product for the purpose of this review. I was not compensated in any other way for this review. If you choose to purchase this product through the above link, I may receive a small commission without you having to pay a cent more for your purchase. Thank you for supporting SincerelyStacie.com reviews.
Posted in Blog
Posted Under almond milk, health, Product Review, Recipe
I've never heard of this product before. How interesting!
Definitely going to buy this!